
 Pin it
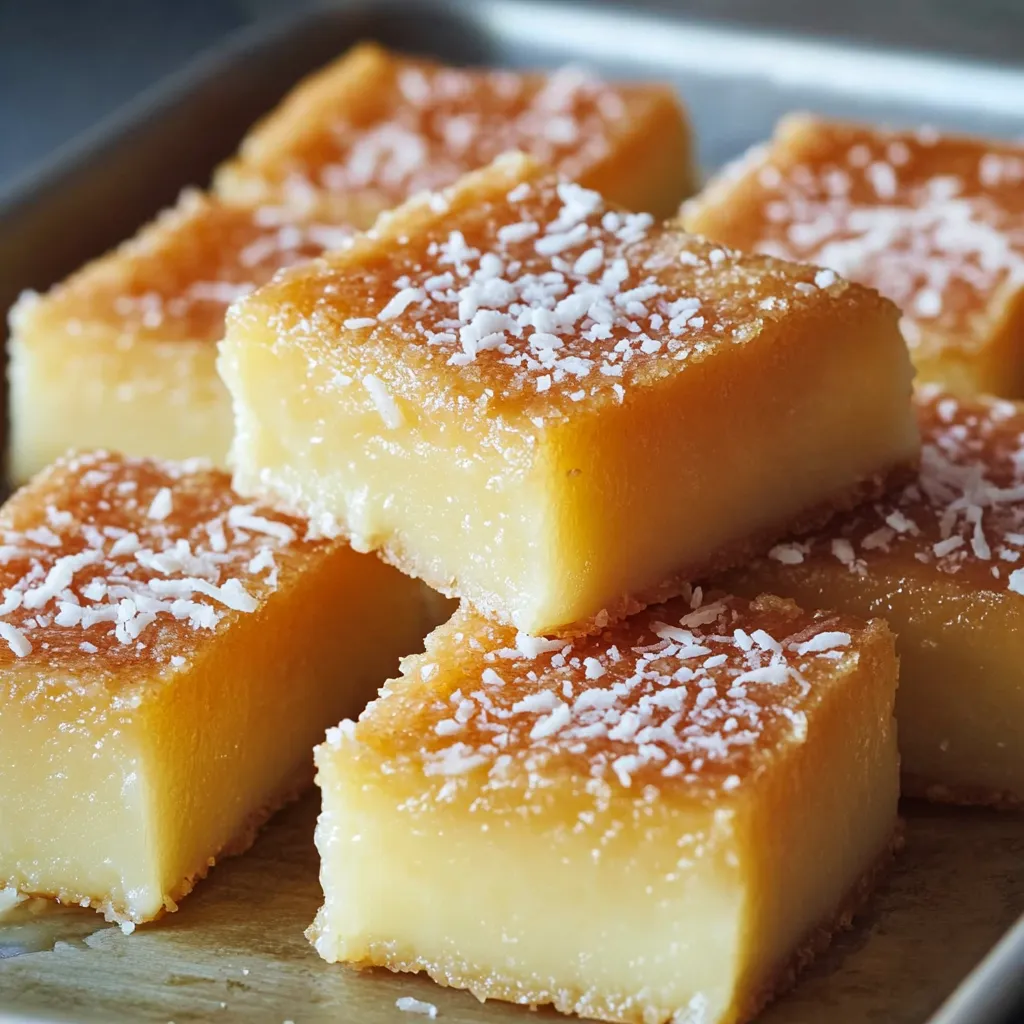
Butter mochi sits at the core of Hawaii's favorite comfort sweets, giving you that amazing mix of chewiness, sweetness, and coconut flavor in each bite. You'll find this treat at every local get-together across the islands, hitting that sweet spot between vanilla yumminess and tropical coconut vibes, all wrapped up in a texture that'll make you smile with every mouthful.
This recipe has been in my family for ages. I can still picture myself next to my grandma as she showed me her trick of knocking the pan to get that smooth, bubble-free finish. Whenever I whip this up now, the smell of vanilla and coconut instantly takes me back to those special times in her kitchen.
Key Recipe Elements
- Mochiko sweet rice flour: Makes that one-of-a-kind chewy feel that butter mochi is famous for, try to grab the package with the blue star for the real deal
- Full fat coconut milk: Brings creaminess and real island taste, go for ones without extra stuff for the cleanest flavor
- Quality unsalted butter: Gives that wonderful melt-in-your-mouth sensation, make sure it's soft before you use it
- Large fresh eggs: Add body and richness, let them sit out a bit first
- Pure vanilla extract: Makes everything taste better, don't use the fake stuff
- Granulated sugar: Cuts through the richness and helps form that tasty crust
- Unsweetened shredded coconut: Throws in a nice texture difference
Making Your Butter Mochi
- Getting Ready:
- Set your oven to 350°F (175°C), with the rack right in the middle. Rub butter all over a 9x13 inch metal baking pan, making sure you don't miss any spots.
- Mix Dry Stuff:
- Stir together mochiko flour, sugar, and baking powder in a big bowl until they're totally mixed.
- Fix Up Wet Stuff:
- Beat room temperature eggs, vanilla, and milk together until they look smooth.
- Put It All Together:
- Add the wet stuff to your dry mix, stirring until it's all combined. Pour in melted butter and coconut milk, mixing till it looks silky. Pour into your pan, tap it a few times to get rid of bubbles, and sprinkle coconut evenly on top.
- Oven Time:
- Bake until you see golden edges and the middle feels firm when you touch it gently. Let it cool all the way before cutting into squares.
 Pin it
In my home, butter mochi has become our go-to celebration treat. My kids especially love helping stir the mixture, and seeing them smile when they taste it makes every batch worth making. This simple dessert has brought so much happiness to our family get-togethers.
Tasty Serving Suggestions
Make your butter mochi even better by eating it with fresh tropical fruits like mango or pineapple. Try it with some Hawaiian coffee for a real island morning treat. For parties, you might want to make a platter with different flavors so your guests can try a bit of everything.
Ways To Switch It Up
Try adding matcha powder for a Japanese-inspired twist with earthy notes. Switch vanilla for coconut extract if you want an extra tropical kick. Mix in some purple sweet potato paste for a stunning ube version that keeps that awesome chewy texture while adding beautiful color and new flavors.
How To Keep It Fresh
Your butter mochi will stay tasty in an airtight container at room temp for about three days. Don't put it in the fridge as this can mess up its chewiness. If you want to save it longer, wrap each piece in plastic and freeze for up to a month, then just let them sit out when you're ready to eat them.
 Pin it
I first learned about butter mochi in my grandma's kitchen, where she taught me that taking your time and paying attention to the little things creates the perfect texture. I still use her old wooden spoon for mixing, since I believe it carries years of love that makes each batch extra special. This isn't just a dessert. It's about Hawaiian friendliness, family traditions, and the joy of sharing something truly wonderful with people you care about.
Frequently Asked Questions
- → Can I leave Hawaiian Butter Mochi out on the counter?
- Yes, just keep it sealed airtight at room temperature for up to 3 days. For longer storage, pop it in the fridge for a week.
- → Why does my mochi feel sticky after baking?
- Sticky mochi might mean it’s undercooked. Let it bake until the top is golden and slightly firm when you touch it.
- → What exactly is mochiko flour, and where do I get it?
- Mochiko, a glutinous rice flour, is sold in Asian grocery stores or in the world foods area of many supermarkets.
- → Is it okay to freeze Hawaiian Butter Mochi?
- Yes, it freezes well for up to 3 months. Cut it into portions, wrap individually, and place in a freezer bag. Thaw at room temperature.
- → Why use a plastic knife to cut it?
- Plastic knives are great for cutting mochi because they don’t stick like normal knives. They help make clean, smooth cuts.