
 Pin it
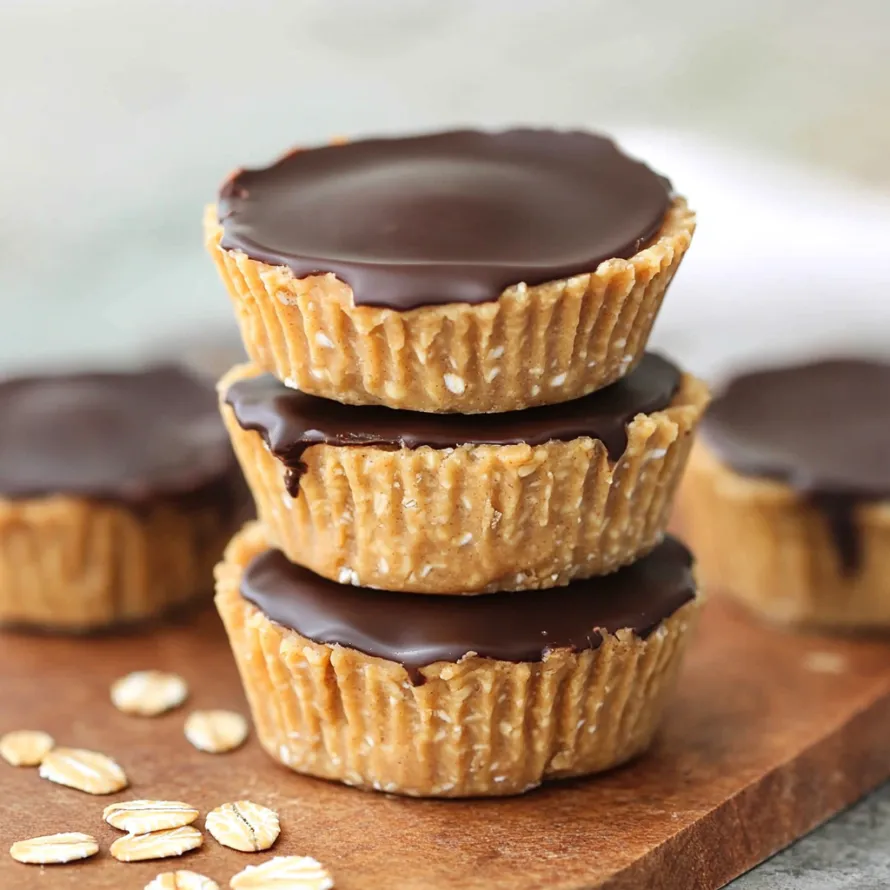
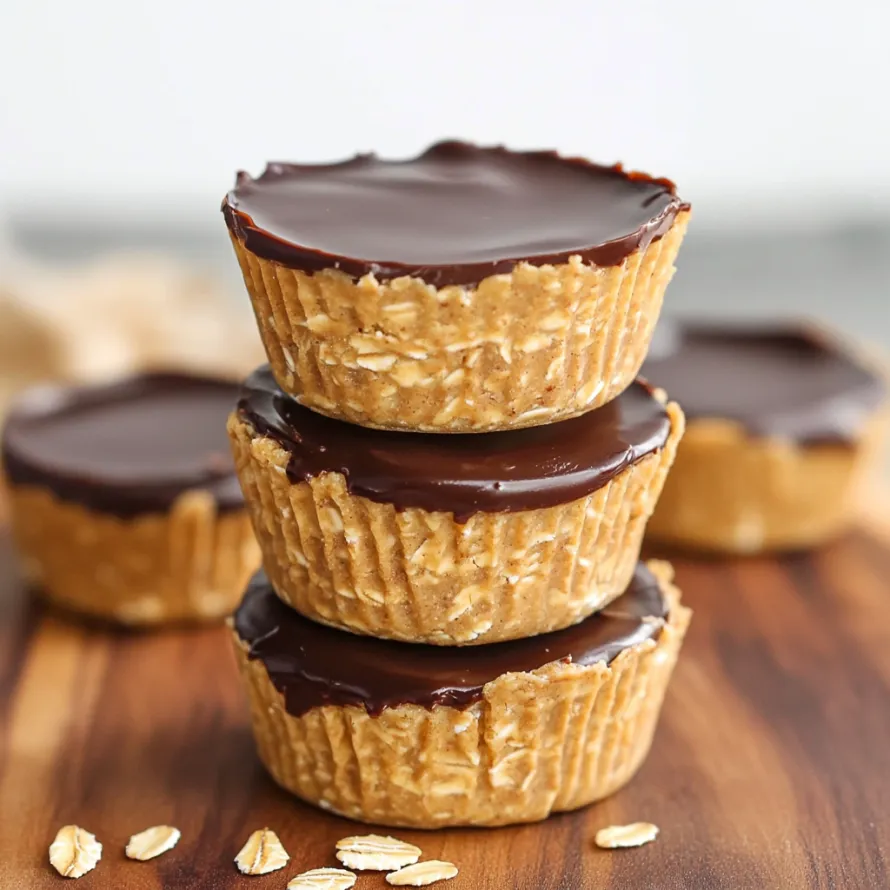
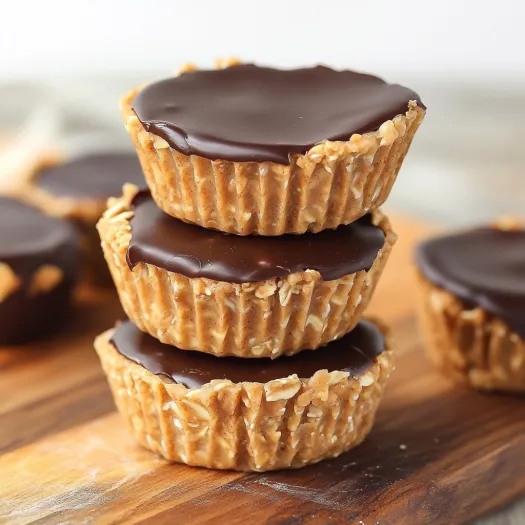
Take your cupboard basics and turn them into amazing no-bake peanut butter oat cups. They hit the spot when you're after something sweet but want to keep things on the healthier side. You get the chew from oats, the creamy peanut butter, and a thick chocolate top—these taste like a treat, but you’re actually fueling up on protein, fiber, and good fats. Skip store-bought candy full of preservatives and sugar—these homemade bites are the real deal.
First time I made these, it was blazing hot outside and I couldn't even imagine turning on the oven. My sweet tooth didn't care though! That first batch vanished from my fridge in under two days. Now I almost always make a pan every weekend for grab-and-go treats all week.
Tasty Building Blocks
- Coconut oil: Makes the chocolate topping nice and shiny and helps it spread easily.
- Chocolate chips: Melt down for a thick, sweet top layer.
- Maple syrup: Brings in a gentle sweetness with some depth that goes awesome with peanut butter.
- Peanut butter: Acts as the main flavor and holds everything together, adding protein and healthy oils.
- Oat flour: Packs in fiber and gives structure—think chewy base, not just filler.
Simple Step-By-Step
- Chill Time:
- Let everything hang out in the fridge a few hours until set and firm.
- Chocolate Magic:
- Stir coconut oil into chocolate chips and melt till glossy and smooth.
- Layer and Finish:
- Top each oat cup base with melted chocolate, making sure to smooth the tops.
- Base Creation:
- Plop the mixture into lined muffin tins, pressing down until you get a nice firm bottom layer.
- Mixing It Up:
- Add oat flour a bit at a time, stirring as you go, until you hit a soft, doughy texture.
- Get Melty:
- Blend peanut butter with maple syrup and gently heat until you’ve got one smooth, creamy blend.
Fun Flavor Switch-Ups
Swap peanut butter for hazelnut for that chocolate-hazelnut vibe. Sprinkle in pumpkin pie spice to make cozy fall cups. Try almond butter and finish with toasted coconut flakes on top—it’s basically a candy bar makeover.
 Pin it
Supercharge Your Snacks
Kick things up a notch by mixing in chia seeds or ground flax for healthy fats and extra fiber. Want more protein? Add a scoop of plain protein powder or some collagen. Chopped dried cherries or blueberries bring a pop of flavor (and antioxidants, too).
Serving Ideas
Team up with fresh berries for a sweet, balanced bite. Break them up and toss over frozen yogurt when you want something special. They’re perfect in lunchboxes or piled on a snack board next to fruit, cheese, and more treats.
Top Storage Secrets
Stash them in an airtight container in the fridge and they’ll stay great for about five days. You can wrap them individually with parchment and freeze for up to a month. Just wait ten minutes after pulling from the freezer so they’re not rock-hard.
One cooking class with kids really taught me a lesson about melting chocolate. A young chef got it too hot, and the whole thing seized up. Rather than toss it out, we tossed the chunks into the oat dough and made a new spin. Turns out, kitchen slip-ups can lead to something really tasty.
 Pin it
Final Takeaways
No-bake peanut butter oat cups are super simple to whip up and they’re actually good for you. Great as a snack, a little dessert, or even after hitting the gym. You get all the yum and none of the guilt.
Frequently Asked Questions
- → Can I use natural peanut butter for these oat cups?
- You sure can use natural peanut butter, but keep in mind the mix might feel a bit different. Make sure you mix it up well to blend any oil back in. If your mix feels a little dry, add a splash more maple syrup till it sticks together right.
- → Can I make these peanut butter oat cups gluten free?
- For sure! Just grab oats marked gluten free or oat flour that's certified. Chocolate chips are usually fine but check the label to be safe. Everything else normally doesn't have gluten.
- → What can I substitute for maple syrup?
- Swap in honey one-for-one if you want, but it'll taste a little different. Agave nectar works too. If you wanna cut the sugar, try mixing monk fruit sweetener with a splash of water, though the mix might not stick quite the same.
- → How do I know if my peanut butter oat mixture has the right consistency?
- You want the mix thick enough that you can squeeze it together and it holds but isn't too sticky. Roll some in your hand—if it makes a nice ball and doesn't fall apart, you're good. Too crumbly? Mix in more syrup or peanut butter just a little at a time. Too sticky? Sprinkle in a bit more oat flour.
- → Can I make these without chocolate on top?
- Totally! They're tasty even plain. You can toss mini chocolate chips right in with the peanut butter oats, or just add a touch of melted peanut butter or dust with cinnamon sugar if you feel like mixing it up.
- → Can I freeze these peanut butter oat cups?
- Oh yeah, stash them in the freezer (use parchment between layers if piling 'em up). They'll last a couple months. When you're ready, let them chill in the fridge or just eat them cold for a firmer bite—they thaw pretty quick.