
 Pin it
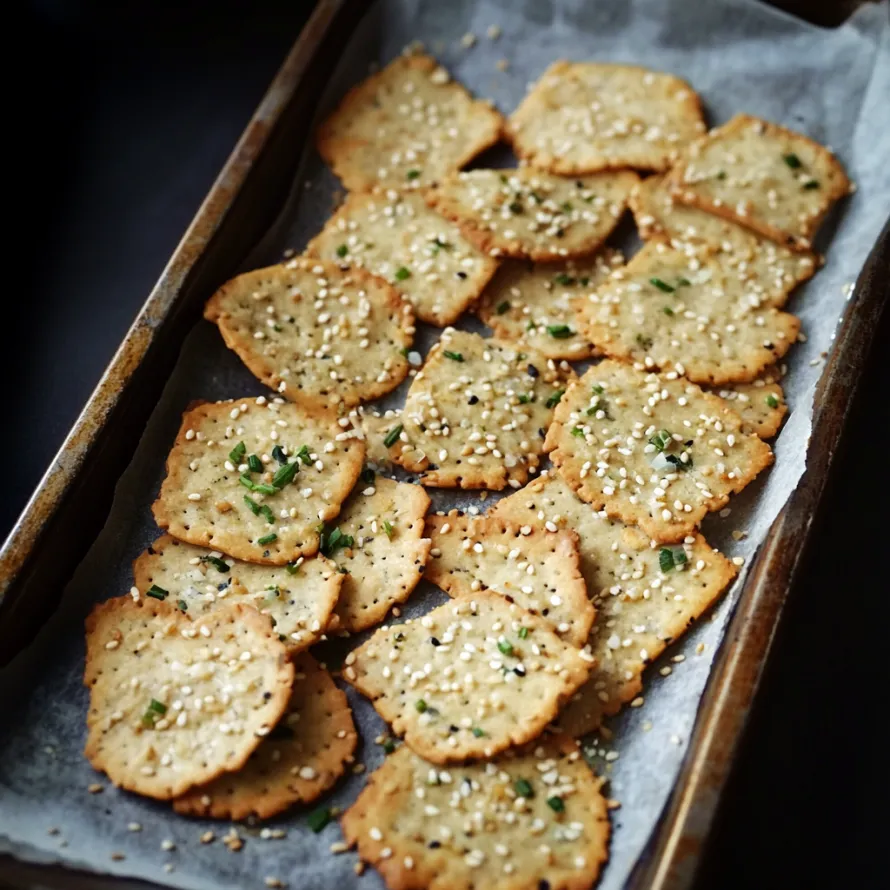
Light, crispy bites dotted with nutty sesame seeds and chopped green onions make a fantastic snack for sharing with friends or just for yourself. You won't find weird chemicals or hard-to-pronounce stuff here—just simple pantry items. With barely any trouble, you'll whip up these crunchy treats so fast, they'll be gone before you know it.
I stumbled across this when looking for a snack my family could munch on without worrying about labels. My mom always checks every package and usually puts it back. I wanted her to have something she’d feel good about eating. She was a little unsure at first, but once she tried them, she was hooked. Now, every time she’s over, she asks for another batch. She says they remind her of what she had growing up but honestly taste even better.
Fresh Ingredients Make a Difference
- Sea salt: Brings out all the flavors and has more minerals than regular salt.
- Fresh milk: Makes the dough nice and soft, better than water does.
- Quality butter: Gives the crackers a rich flavor—way better than oil.
- Baking soda: Keeps them nice and light and stops them from puffing up too much.
- Active dry yeast: Adds a small boost in flavor, but don't worry, these aren't bready.
- Sesame seeds: Bring toasty flavor and a little crunch in every bite.
- Fresh scallions: Tastes like mild onions, so much better than the fake flavors in some brands.
- All-purpose flour: Gives the crackers a solid but crispy feel—tough enough to use with dips and toppings.
Easy Steps to Make
- Baking the Crackers:
- Bake the trays for 12 to 15 minutes at 375°F, swapping them around halfway through so everything browns just right. In the last couple of minutes, keep an eye out—they go from golden to too dark fast. Crackers are ready once you spot golden edges and a dry top. Let them cool on the pan—this is where they get extra crisp.
- Shaping the Dough:
- Cut rounds with a glass or cookie cutter (about 2 inches works great), press all the way through, and move the pieces to your lined baking tray. Leave a little gap between them so the heat gets everywhere. Grab a fork and poke holes in every round, which keeps them flat and crunchy. Ball up the leftover dough and go again. Repeat with the rest of the dough sitting in the bowl.
- Rolling It Out:
- First, set the oven to heat up to 375°F, get parchment-lined trays ready, and divide your rested dough in half. Stick half under cover while working. Put your chunk on parchment or a floured spot, oil the rolling pin lightly, and start rolling out from the center in all directions. Give the dough a turn now and then for even thickness until it's as thin as a nickel (about 2mm). Thinner dough means extra crispiness; slightly thicker makes them heartier.
- Letting It Rest:
- Shape your dough into a ball, pop it into a lightly oiled bowl, and cover it with a towel or plastic wrap. Set it aside on the counter for 15 minutes. That quick break lets everything come together and makes rolling out easier. No need to wait for a big rise—we're not making bread, you want a flat, crunchy bite.
- Mixing It Up:
- Grab a big bowl and toss in your flour (2 cups), yeast (1 tsp), baking soda (1/2 tsp), and salt (1/2 tsp). Whisk until blended. Sprinkle in the chopped scallions (3 tbsp) and sesame seeds (3 tbsp) and mix them evenly through the flour. Poke a well in the middle, pour in the melted butter (3 tbsp) and milk (1/2 cup). Blend with a spoon or spatula until it starts to come together, then switch to your hands and form it into a soft dough. Knead gently for about 2 minutes inside the bowl. If it feels too dry, splash in another teaspoon of milk; too sticky, dust it with extra flour until it feels right.
 Pin it
My grandma always used to say, the most basic foods taste the best, and these bring that to life. The first batch surprised me—tasted like something you’d buy from a fancy shop, but anyone can make them with everyday stuff from the pantry. The hint of yeast is a little magic that really steps up the flavor, so people always think they’re more complicated than they are.
Tasty Ways to Enjoy
Pile these up on a wooden platter with some creamy goat cheese and sweet fig jam for an easy snack everyone loves. They go great with hummus or avocado dip if you just want to munch. Drop a handful beside a bowl of soup or stew—they stay crisp and taste awesome. If you feel fancy, top a few with smoked salmon and crème fraîche right before folks arrive.
 Pin it
The secret here is how easy and honest these are. We're surrounded with snacks that have a million things you can't pronounce, but this is just flour, butter, scallions, and care. Every time I bake a batch, I feel connected to the way people used to bake—everything’s about flavor and goodness, not shelf life or looking perfect. Sure, mixing and rolling takes a bit more energy than opening a bag, but the flavor and crunch beat any store-bought stuff, hands down.
Frequently Asked Questions
- → Could I swap in whole wheat flour for all-purpose?
- Go for it! Whole wheat will give a nuttier taste and more fiber, but expect crackers to be a bit firmer. You might want to splash in a little extra milk since that flour soaks up more moisture.
- → What’s the best way to keep these Scallion Sesame Crackers fresh?
- Drop them in a sealed container and keep them on the counter for up to a week. If they lose their crunch, slide them in a 350°F oven for a couple of minutes and they're crisp again.
- → Can I prep these crackers for later?
- For sure! Whip up your dough, cover it, and chill for up to a day. Bring it to room temp before flattening. Toss baked crackers in the freezer for as long as three months if you like.
- → What goes well with these Scallion Sesame Crackers?
- Try them with your favorite dip, smeared with cream cheese, soft cheese like brie, or even plain. They also make a great addition to any snack board.
- → Is it okay to mix in extra spices or herbs?
- Absolutely! Chop up some rosemary, thyme, or toss in a little black pepper or cayenne if you want a kick. Go for it—just chop those fresh herbs super fine so they mix in easily.
- → Why poke holes in crackers before baking?
- Punching holes stops bubbles from popping up and keeps your crackers baking flat and crisp every time.